


 4:10 PM
 Amy and Meagan


My son's last day of school was yesterday. He was so excited to be out, but wanted to do something nice for his teacher. I knew I had to find something reasonably inexpensive and easy to make. We decided on a decorated flower pot with a plant. Here is a loose tutorial on how we made it. I know this is probably too late for most parents, since schools are out or almost out everywhere already, but hopefully if you like the idea, you can use it next year. Just an FYI, I did not take these pictures with the intention of writing a tutorial, so I'm sorry that some steps are missing pictures.
Decorated Flower Pot
 |
| Materials |
Materials:
* Terra Cotta Pot
* Acrylic Paint (black, yellow, white, and 1-2 other colors)
* Sponge brushes
* Small paint brush
* Flexible measuring tape
* Pencil
* Plant or flower(s)
* Soil
How to Make it:
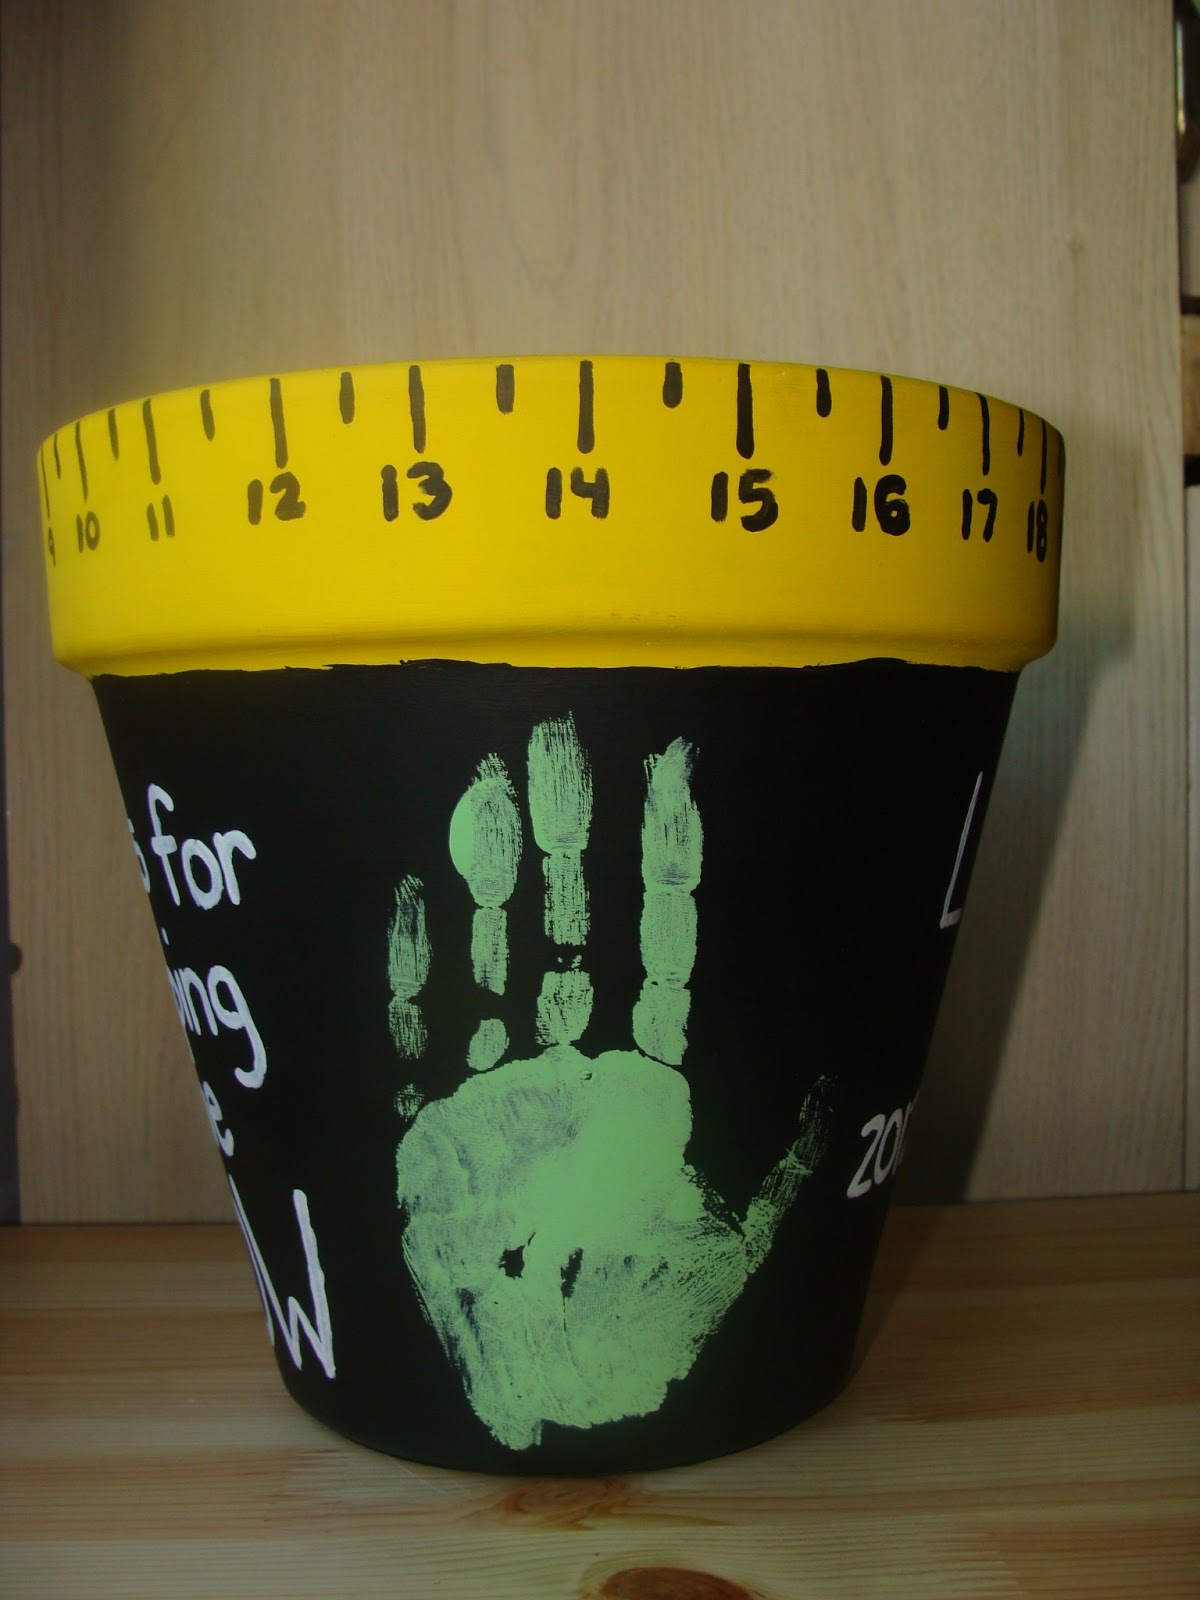
1) Paint the rim in yellow. This will probably need 2-4 coats depending on the shade of yellow you use. Allow 15-20 minutes to dry between coats.

2) Once the yellow is completely dry (at least 1 hour), start painting the lower portion of the pot black. The black will probably need 2-3 coats to completely cover the pot. Try and make the cleanest line possible along the rim where the yellow is. It will look nicer.

3) While the sides are drying, you can flip the pot over and start painting the bottom. You don't have to do this, but I think it looks nicer this way. The bottom only needs 2 coats.

4) Take your measuring tape (a sewing tape works great) and wrap it around the rim of the pot. Tape it in place in at least 3 spots, so it doesn't fall off during this step. (Sorry, no pictures for this step.)
5) Now you are going to mark every inch and half inch on the pot with the pencil. You don't have to write the numbers, just put the lines. Depending on what size pot you are using, you may have to fudge the last few lines if they don't line up right. (Sorry, no pictures for this step.)
6) Once your lines are on your pot, remove the tape. Now go over the lines with a small paint brush in black paint. I think you could also use a thick permanent marker if you wanted to. Once all of your lines are filled in black, you are going to write the numbers under the "inch" lines you marked. Start with 1 and continue all the way around the pot. It doesn't matter what number you end on. I think mine ended on 26.

7) Now you need to decide what you want to write on your pot. I suggest you use white paint for words, if you want it to look like chalk on a chalkboard. We wrote "Thanks for helping me GROW" on one side, then put my son's right hand print, then wrote "Luke, 2012-2013" on the other side, then put his left hand print.
Finished Product:


She absolutely LOVED it when we gave it to her yesterday! She couldn't wait to take it home and show it to her husband. We also wrote her a little thank you note for being such a great teacher this year.


0 comments:
Post a Comment